Installing wall-mounted shelving is one of the most transformative updates you can bring to an American home, instantly curing empty wall syndrome while adding functional display space. However, achieving that high-end architectural look requires looking past generic installation instructions and understanding the realities of typical U.S. residential construction. Most modern American homes feature drywall interiors backed by wood framing spaced at standard sixteen-inch intervals, presenting specific structural considerations that dictate where and how you can anchor your materials safely.
Successfully executing a shelving project means striking a balance between raw aesthetic appeal and robust engineering. Whether you are outfitting a compact suburban apartment living room or adding warmth to a newly built kitchen, taking the time to match your lumber selection, mounting hardware, and styling approach ensures your shelves look intentional rather than temporary. By addressing structural limitations early in the planning phase, you avoid common pitfalls like sagging boards, stripped drywall anchors, and misaligned brackets that compromise both safety and design.
Navigating U.S. Wall Construction and Locating Studs
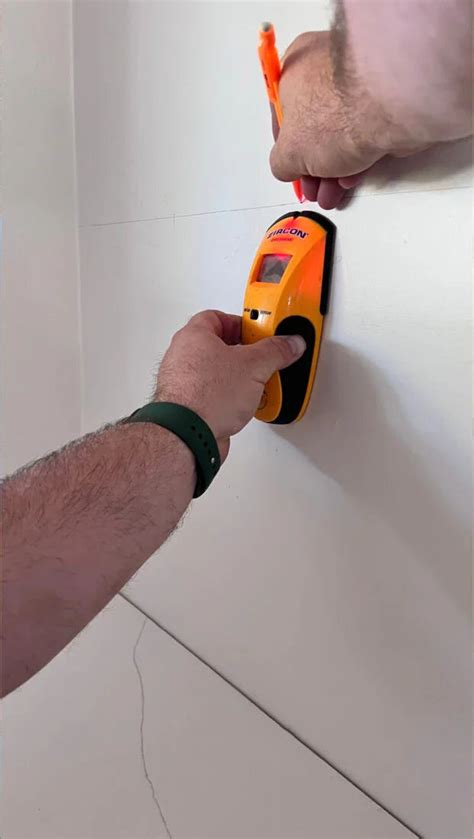
The foundation of any secure wall installation begins inside the wall cavity rather than on its surface. In the vast majority of American houses and townhomes, vertical wood studs form the skeleton of the interior walls, typically positioned sixteen inches apart on center. Utilizing these wooden supports provides the ultimate anchor point for heavy loads, such as stacked hardcover books, cast-iron kitchenware, or dense ceramics. Relying solely on drywall without hitting at least one structural stud drastically reduces the weight capacity of your installation and invites future failure.
To locate these hidden structural members accurately, invest in a reliable electronic stud finder or use traditional knock-and-measure methods. Magnetic stud finders are also exceptionally useful because they detect the drywall screws or nails already driven into the studs during construction, offering a precise vertical line. Once you locate your primary stud, measure out in sixteen-inch increments to anticipate where subsequent studs will fall. Marking these points lightly with a pencil helps you plan your shelf length and bracket placement before a single hole is drilled.
Selecting the Right Boards, Brackets, and Hardware
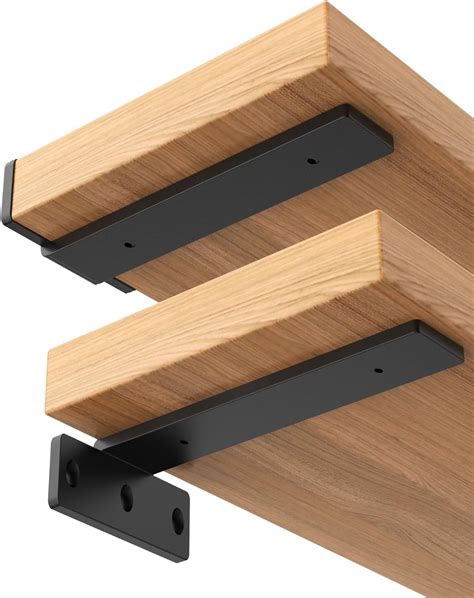
Material selection defines the character of your DIY shelving project, transforming basic utility lumber into a bespoke design feature. Standard dimensional lumber purchased from typical American home improvement centers often requires a bit of prep work, including thorough sanding, conditioning, and staining or sealing to achieve a polished finish. Hardwoods like oak, walnut, and maple offer incredible grain patterns and durability, while more budget-friendly softwoods like pine can be stained to mimic expensive exotic woods when treated with a proper pre-stain wood conditioner.
Hardware choice is equally critical, acting as the structural bridge between your carefully finished wood and the wall. Heavy-duty steel brackets provide an industrial or modern farmhouse aesthetic, whereas minimalist floating shelf brackets hide completely inside a hollowed-out board for a sleek, contemporary profile. When studs do not align with your ideal shelf placement, heavy-duty toggle bolts or threaded drywall anchors are necessary. Always check the manufacturer’s specified weight ratings for both your brackets and your anchors to ensure they comfortably exceed the expected load of your display items.
Step-by-Step Installation for Secure and Level Shelving
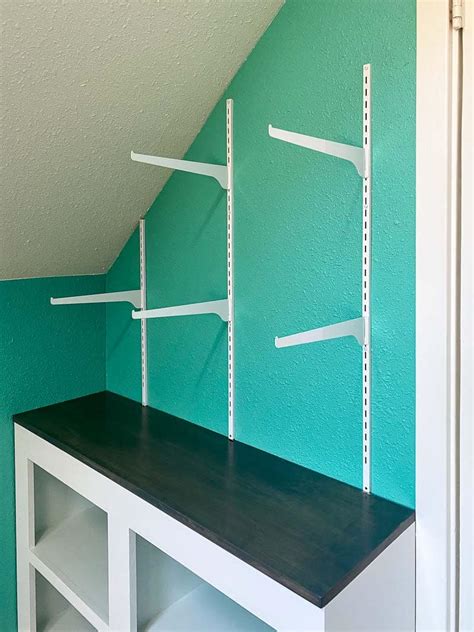
Beginning the physical installation requires patience, the right tools, and an unwavering commitment to your bubble level. Start by holding your shelf or bracket against the wall at your desired height, having a helper assist you if you are working with longer boards. Place a torpedo level on top of the bracket or board, adjusting until the bubble rests perfectly centered between the indicator lines. Use a pencil to mark the exact screw hole locations directly onto the wall surface through the bracket mounts.
After marking your pilot hole locations, remove the hardware and prepare the wall based on your anchoring strategy. If you are drilling directly into a wood stud, use a drill bit slightly smaller than your mounting screws to create a clean pilot hole that prevents the wood from splitting. If you are using drywall anchors, drill the appropriate size hole, tap the plastic or metal anchor in gently with a hammer, and then drive your screws through the bracket and into the anchor until snug. Re-check your level one final time before tightening all fasteners completely to ensure nothing shifted during the process.
Styling Formulas and Rental-Friendly Alternatives
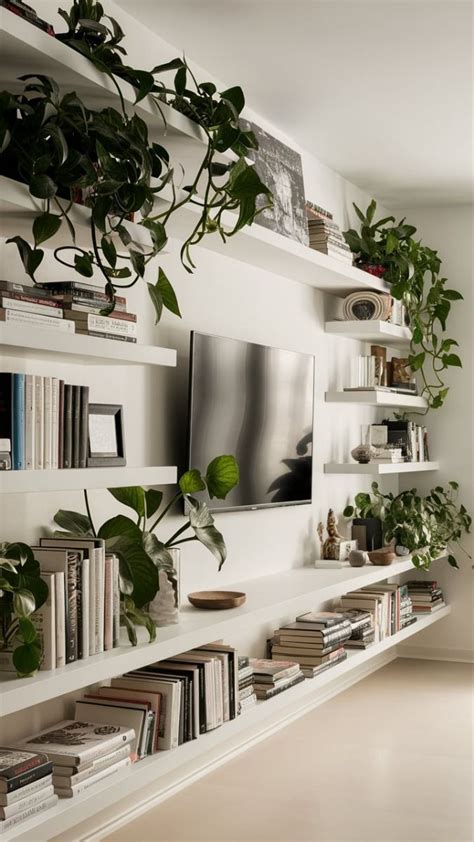
Once your shelves are securely anchored, styling them becomes an exercise in creative curation rather than random overcrowding. A reliable interior design formula involves mixing vertical and horizontal shapes, incorporating natural elements like potted trailing plants, and balancing heavy objects on lower shelves with lighter decorative accents near the top. Leave plenty of negative space around your objects to let the raw texture of the wood and the clean lines of the brackets stand out as design statements in their own right.
For renters or those hesitant to drill multiple holes into plaster or drywall, alternative mounting solutions offer stylish compromises without sacrificing security. Heavy-duty adhesive mounting strips designed specifically for picture ledges work well for ultra-lightweight decor, while tension-fit shelving units provide vertical storage without permanent wall attachment. If you do drill into rental walls, choose smaller brackets and plan to patch the screw holes carefully with spackle and touch-up paint upon moving out, preserving your security deposit while enjoying a personalized home environment.
Frequently Asked Questions
How high should wall-mounted shelves be installed above furniture?
As a general rule of thumb in interior design, shelves mounted above sofas, desks, or console tables should sit approximately ten to twelve inches above the top surface of the furniture. This leaves enough clearance for everyday use of the furniture surface while keeping the items on the shelf visually connected to the piece below.
Can I install heavy shelves without hitting a stud in drywall?
While you can use heavy-duty toggle bolts or threaded metal anchors to mount lighter shelves on drywall alone, hanging heavy items without stud support is strongly discouraged. Drywall has a limited shear strength and can crumble under sustained weight or sudden pressure, leading to damaged walls and fallen items.
How do I prevent my DIY wooden shelves from warping over time?
To prevent warping, choose kiln-dried lumber with a low moisture content and avoid selecting boards that already show signs of cupping or twisting at the store. Additionally, ensure your shelf boards are thick enough (at least one and a half inches for heavier loads) and that your support brackets are spaced no more than thirty inches apart.
What is the easiest way to finish raw pine boards for a high-end look?
Raw pine has a tendency to absorb stain blotchily. To achieve a professional finish, sand the wood thoroughly with progressive grits up to 220, apply a pre-stain wood conditioner to ensure even absorption, wipe on an oil-based stain of your choice, and finish with two to three coats of a clear matte polyurethane for protection.


