Transforming a blank living room wall or empty corner with custom built-in cabinets and shelves is one of the most rewarding home improvement projects you can undertake. Not only do built-ins maximize vertical storage capacity, but they also provide a high-end architectural focal point that standard freestanding furniture simply cannot match. In typical American houses featuring standard wood-frame construction, tackling this as a DIY project requires careful preparation, precise measuring, and a solid understanding of how walls and floors interact.
While the prospect of cutting lumber and fastening cabinetry directly to your walls might seem intimidating at first, breaking the workflow down into manageable phases makes the entire endeavor achievable. Whether your goal is to showcase an extensive book collection, house electronic components, or conceal clutter behind neat cabinet doors, careful planning ensures your custom creation looks like it was built right into the original blueprint of the house.
Assessing Space and Taking Accurate Measurements
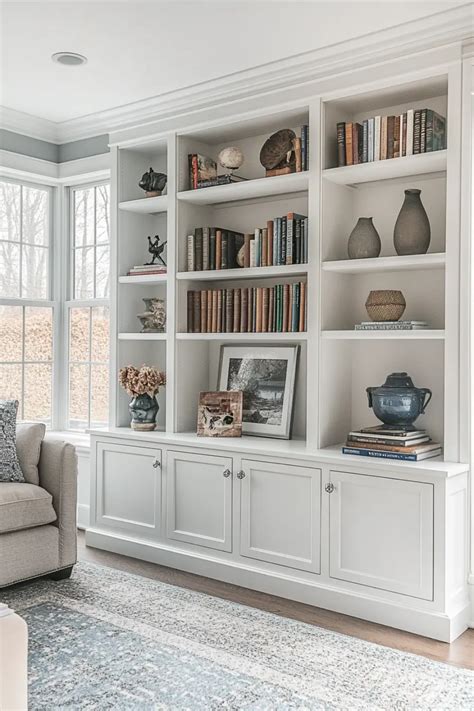
Before purchasing a single sheet of plywood or browsing hardware aisles, you must evaluate your chosen wall space thoroughly. Standard U.S. homes rarely feature perfectly square corners or completely level floors, especially in older properties that have settled over decades. Take multiple height, width, and depth measurements at various points along the wall, noting any irregularities. These small variances will dictate how you trim out your final installation to achieve a seamless, professional finish.
Mapping out your electrical outlets, heating vents, and baseboard heaters is another critical step during this assessment phase. If a built-in cabinet covers an existing wall outlet, you will need to plan for relocating the outlet to the interior of the cabinet or cutting an access port through the back panel. Neglecting these utilities early in the process invariably leads to frustrating modifications halfway through assembly.
Choosing the Right Materials and Tools
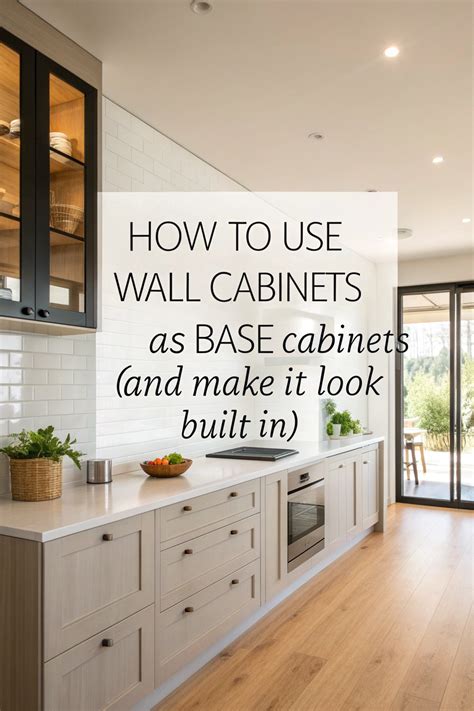
Selecting durable, high-quality materials dictates the longevity and appearance of your built-ins. For cabinet boxes and structural shelving, 3/4-inch cabinet-grade plywood—such as maple or birch—offers superior strength and resists warping much better than solid wood boards, which expand and contract with seasonal humidity changes. For face frames and visible trim, select clear pine, poplar, or hardwood matching your desired paint or stain grade.
Having the proper tool arsenal streamlines the build and ensures clean, accurate cuts. Essential equipment includes a reliable table saw or circular saw with a straight-edge guide, a miter saw for trim work, a pocket-hole jig for invisible joinery, a power drill and impact driver, and a digital stud finder. Clamps of various sizes and a dependable level are equally indispensable for keeping everything square during assembly.
Designing the Cabinet Box and Shelf Layout
Designing your unit involves balancing the lower closed-door storage with upper open shelving. A standard lower cabinet depth of 18 to 24 inches provides ample space for bulky items without protruding too far into standard living room or office traffic patterns. Upper open shelves generally work best at 10 to 12 inches deep, preventing books or decorative accessories from looking swallowed up by overly deep surfaces.
Consider incorporating adjustable shelf standards or a system of shelf pins rather than permanently fixing every shelf in place. This flexibility allows you to reconfigure your display layout later as your storage needs evolve. Sketching your design on graph paper or using simple 3D modeling software helps verify proportions and ensures the vertical spacing feels balanced to the eye.
Building and Assembling the Framework
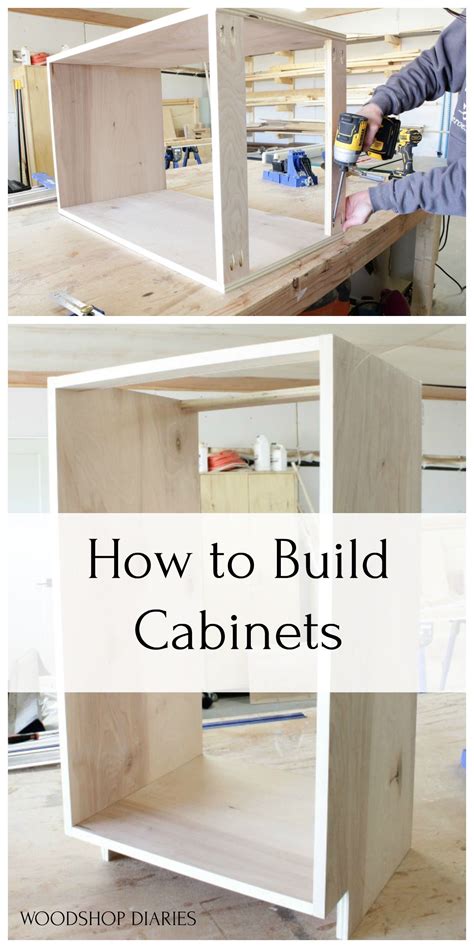
Constructing the individual cabinet boxes forms the backbone of your project. Using your pocket-hole jig, drill pilot holes along the edges of your plywood side panels, top, bottom, and fixed shelves. Assemble the boxes using wood glue and pocket screws, constantly checking with a square to ensure 90-degree angles. If your design includes a toe-kick at the bottom, build a sturdy ladder-style base platform to lift the lower cabinets off the floor.
Once the individual boxes are complete and squared, join them together side-by-side in your workshop or garage before moving them into position. Attaching a solid plywood back panel to each box adds tremendous rigidity, ensuring the structure will not rack or lean under heavy loads once installed against the wall.
Securing Built-Ins Safely to Wall Studs
Installation day requires patience and a methodical approach. Position your assembled cabinet base against the wall and use your digital stud finder to locate the vertical framing studs behind the drywall. Mark these stud locations clearly on the inside of your cabinet boxes so you can drive heavy-duty structural screws directly through the cabinet back into the wood framing.
Because floors are rarely flat, use wood shims underneath the base platform to level the entire assembly from left to right and front to back. Check your adjustments repeatedly with a long spirit level. Once the cabinets are firmly anchored to the studs and perfectly level, trim off any excess wood shims flush with the floor using a utility knife or multi-tool.
Finishing Touches: Trim, Caulking, and Paint
The transition from a homemade project to a custom built-in masterpiece happens during the finishing stage. Install face frames of select hardwood over the front edges of your plywood boxes to hide exposed laminate layers. Add crown molding at the ceiling, baseboards at the floor, and scribe molding along any gaps where the unit meets uneven walls.
Fill all nail holes, gaps, and joints with paintable wood filler or flexible latex caulk, sanding every surface smooth once dry. Apply a coat of quality primer followed by two coats of durable semi-gloss or satin cabinet paint, rolling flat surfaces and brushing corners for a factory-smooth finish that elevates the entire room.
Frequently Asked Questions
How do I anchor built-in cabinets safely to drywall and wall studs?
Always anchor your built-in cabinets directly into the vertical wooden wall studs behind the drywall using sturdy structural screws, ideally at least 2.5 to 3 inches long. Never rely solely on drywall anchors for heavy shelving units, as the weight of books and cabinetry can cause drywall anchors to pull free over time.
What materials are best for sturdy DIY bookshelves and cabinets?
Three-quarter-inch cabinet-grade plywood, such as maple or birch, is the industry standard for building durable cabinet boxes and shelving because it resists warping. Use solid hardwoods like poplar or pine for face frames, toe-kicks, and decorative trim work.
How can I make DIY built-ins look high-end and professional?
The secret to a professional look lies in meticulous preparation and finishing. Build a face frame to cover exposed plywood edges, fill all nail holes and gaps with wood filler or caulk, and apply multiple coats of smooth cabinet paint with proper sanding between coats.
What tools do I need to get started on a built-in shelving project?
Essential tools include a circular saw with a straight-edge guide or table saw, a miter saw for trim, a pocket-hole jig, a power drill and driver, a digital stud finder, a long spirit level, and plenty of woodworking clamps.


