When floor space is at an absolute premium, looking upward is the single most effective strategy for home organization. Whether you are living in a compact city apartment or trying to clear clutter from a cozy suburban family room, smart wall storage transforms dead wall space into functional design assets. Building your own storage solutions gives you custom dimensions that store-bought furniture simply cannot match, often at a fraction of the retail cost.
Approaching your home organization with a DIY mindset allows you to tailor every board, bracket, and finish to your specific architectural layout. However, successful shelving goes beyond simply screwing a plank of wood into a wall. Understanding structural integrity, weight distribution, and wall material is essential for preventing disastrous collapses. The following curated collection of fifteen creative shelving ideas spans beginner-friendly temporary setups and advanced woodworking projects, giving you practical options regardless of your tool proficiency or lease restrictions.
Renter-Friendly Temporary Shelving Solutions
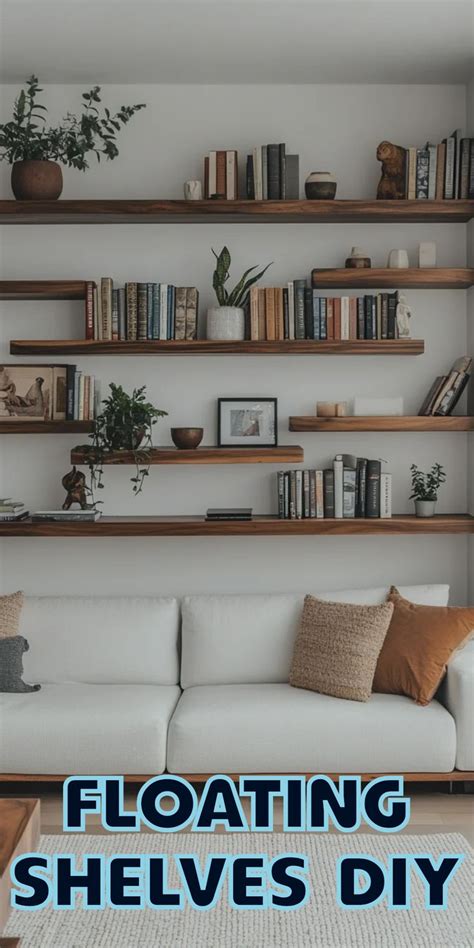
Lease agreements often restrict permanent alterations, leaving apartment dwellers struggling with traditional wall anchors and heavy hardware. Fortunately, modern DIY ingenuity provides several ways to add substantial vertical storage without forfeiting your security deposit. These non-permanent concepts rely on tension, heavy-duty Command strips, or existing architectural features to support your belongings securely.
One popular temporary approach involves utilizing tension rods between narrow pantry or hallway walls to support lightweight wire baskets or wooden ledges. Another brilliant renter hack is building a freestanding leaning ladder shelf using lightweight pine boards. By securing the top of the ladder to the wall using a single, easily patchable picture-hanging hook, you prevent tipping while keeping wall damage to an absolute minimum.
Adhesive Ledge Shelves for Lightweight Displays
Using lightweight picture-ledge molding combined with heavy-duty exterior mounting tape creates a sleek display surface for books and framed art without a single drill hole. The key to success with adhesive hanging is thoroughly cleaning the wall surface with rubbing alcohol to remove dust and oils before application. Allow the adhesive to cure for a full twenty-four hours before placing any weight on the shelf.
While these shelves cannot support heavy ceramic planters or massive book collections, they excel at holding lightweight decor items in tight hallways, rental bathrooms, or dorm rooms. When moving out, simply heat the adhesive strips with a hairdryer to soften the foam, and gently peel them away from drywall without leaving unsightly craters.
Classic Wood and Metal Floating Shelves
For homeowners seeking a clean, modern aesthetic where hardware remains completely hidden, sturdy floating shelves are the gold standard. Constructing these requires building an internal support ladder out of dimensional lumber or steel rods that anchors directly into wall studs. A hollow wooden box sleeve then slides securely over the internal framework, creating a seamless floating appearance.
The secret to building long-lasting floating shelves lies in precise measurement and locating wall studs using an electronic stud finder. If your studs do not align with your preferred shelf placement, heavy-duty toggle bolts or drywall anchors rated for high loads are necessary, though studs should always be utilized whenever possible to support heavier items like kitchen dishware.
Industrial Pipe and Reclaimed Wood Shelves
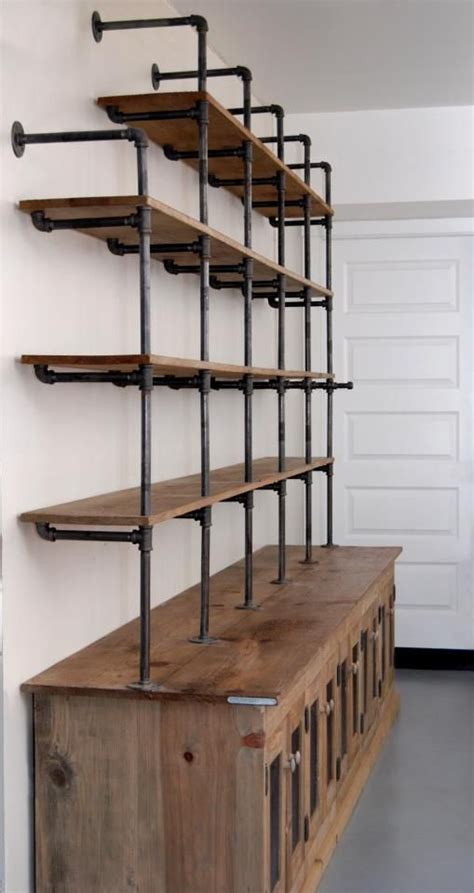
Combining dark iron plumbing pipes with weathered reclaimed lumber yields a rugged, urban aesthetic that fits industrial, rustic, and transitional decor styles. This project is surprisingly beginner-friendly because it relies on pre-threaded galvanized steel pipes and floor flanges available at any local hardware store. You simply screw the pipe assemblies together and mount them directly to the wall studs.
When sourcing reclaimed wood for industrial shelving, inspect the boards for protruding nails, deep gouges, or excessive moisture. Sanding the wood thoroughly with medium-grit sandpaper removes splinters while preserving the charming patina. Finish the wood with a clear matte polyurethane or beeswax sealant to protect against moisture rings and daily wear.
Maximizing Awkward Spaces and Corners
Every home features awkward architectural zones—narrow nooks between windows, tight kitchen corners, or vertical spaces above doorways—that typically go completely unutilized. Custom-cut triangular corner shelves transform dead corners into charming display areas for trailing houseplants, framed photographs, or spice collections.
Building corner shelves requires precise angle measurements using a speed square to ensure the back edges sit flush against intersecting walls. For a polished look, consider cutting floating corner boxes that utilize concealed dowel pins or small corner brackets tucked discreetly underneath the shelving boards.
Over-the-Door and Vertical Tower Organizers
Vertical towers make exceptional use of narrow wall strips, such as the space beside a bathroom vanity or behind a bedroom door. Building a shallow vertical rack with narrow depth ensures you can store items like cosmetics, spices, or paperback books without obstructing walking paths or door swings.
When designing over-the-door or narrow vertical towers, ensure the height-to-width ratio remains stable so the unit does not warp or wobble during regular use. Using lightweight plywood or MDF keeps the overall weight manageable, making installation straightforward and reducing strain on hinges or wall anchors.
Budget-Friendly Upcycled Storage Projects
Sustainability and style go hand-in-hand when you upcycle everyday materials into functional home storage. Wooden shipping crates, discarded pallets, and old wooden drawers can be transformed into modular cubbies or rustic wall boxes with minimal carpentry skills and a fresh coat of paint.
Before using wooden crates or pallets indoors, ensure the wood is safe by checking for heat-treated stamps rather than chemical pesticide treatments marked with a “MB” stamp. Sand all rough surfaces thoroughly, prime any raw timber, and secure multiple crates together using wood screws to create a custom geometric shelving unit.
Frequently Asked Questions
What are the best DIY shelves for renters that won’t damage walls?
Renters can successfully use freestanding leaning ladder shelves secured with a single picture hook, tension-rod shelving units, or lightweight wooden ledges mounted with heavy-duty removable adhesive strips. These solutions provide ample storage without requiring extensive wall repairs upon moving out.
How do I build sturdy floating shelves that won’t sag?
To prevent sagging, construct a robust internal support frame anchored directly into at least two wall studs using heavy-duty wood screws. Ensure your hollow outer box fits snugly over the internal support arms, and avoid overloading the front edge of the shelf with excessive weight.
What materials are the cheapest for DIY shelving?
Standard dimensional framing lumber (such as whitewood or pine boards), MDF panels, and upcycled wooden shipping crates or pallets offer the lowest material costs. These budget-friendly options can easily be painted, stained, or distressed to look high-end.
How can I maximize storage in small spaces using vertical shelves?
Focus on utilizing vertical wall space extending upward past eye level, especially in narrow transitional zones like hallways, above doorways, and in tight corners. Tall, shallow shelving units draw the eye upward and keep floor areas clear.


