Few architectural features command a room quite like a wall of custom built-in bookshelves. They instantly introduce warmth, character, and a profound sense of permanence to standard drywall-and-stud American living spaces. While hiring a professional cabinetmaker can easily strain your budget, achieving a high-end architectural look through a weekend DIY project is entirely possible. By utilizing readily available lumber, standard shop tools, and thoughtful planning techniques popularized by passionate home renovators, you can completely transform a blank wall into a cozy focal point that houses your favorite literature and cherished decor.
Successfully tackling this project does not require an advanced carpentry degree, but it does demand careful measuring, patience during the trim work, and strict adherence to wall-safety guidelines. Whether you own a suburban colonial with traditional molding or a modern apartment requiring renter-friendly workarounds, breaking the process down into logical phases ensures a smooth workflow. From assessing your room layout to applying the final coat of satin paint, every step brings you closer to a library wall that feels like it was always meant to be part of the house.
Assessing Your Space and Planning the Layout
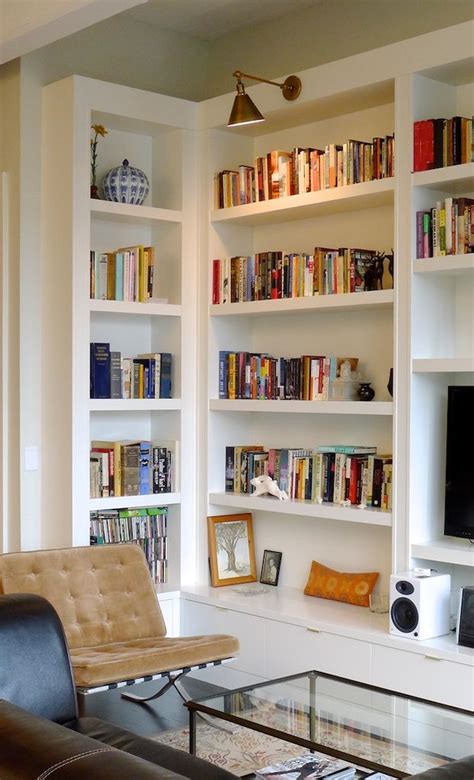
Before purchasing a single board of lumber or plugging in a power drill, evaluate the wall where you intend to build your shelves. Standard American homes often feature slight structural imperfections, such as bowed walls, sloping floors, or protruding baseboards that can complicate flush installations. Take multiple horizontal and vertical measurements using a reliable laser measure or tape, noting the exact ceiling height and the location of electrical outlets or heating vents that might need rerouting or clearance.
Creating a scaled sketch or digital floor plan helps you determine the ideal proportions for your shelving unit. Decide whether you want floor-to-ceiling shelves, a lower bank of closed cabinets with open shelving above, or a balanced surround framing an existing fireplace or window. For standard drywall construction, locating and marking your wall studs with a stud finder is an essential preliminary step. This ensures that your finished unit can be securely anchored, supporting the significant weight of heavy hardback books without shifting over time.
Gathering Materials and Essential Tools
Choosing the right materials dictates both the durability and the aesthetic outcome of your built-in project. Many DIYers prefer using paint-grade medium-density fiberboard (MDF) for cabinet doors and smooth vertical partitions because it provides a flawlessly flat surface that resists warping. For the actual shelves, select select-grade pine, poplar, or cabinet-grade plywood with hardwood edge banding to prevent sagging under heavy loads. Avoid cheap construction-grade lumber, which often features knots, twists, and excessive moisture that causes warping after installation.
Your tool kit should include a reliable miter saw for precision cuts, a table saw or circular saw with a straight-edge guide, a brad nailer, a power drill, and a random orbital sander. Safety gear, including protective eyewear and a dust mask, is non-negotiable when cutting MDF or sanding primer. Stock up on wood glue, pocket-hole screws, painter’s caulk, spackle, and a high-adhesion primer designed to bridge gaps between raw wood, MDF, and existing wall paint.
Constructing the Base and Securing Framework
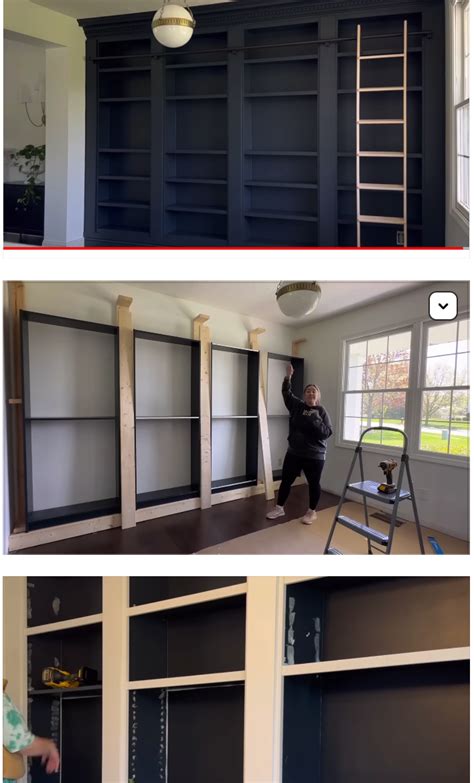
The foundation of your built-in unit sets the stage for everything that follows. If you are building a unit with lower cabinets, construct a sturdy toe-kick platform using 2×4 framing lumber leveled precisely with shims against the floor. Secure this base directly to the wall studs through the back plate. Next, build or position your main vertical shelving carcases atop this platform, ensuring each vertical divider stands plumb and square relative to the adjacent walls.
Securing the upper sections of the bookcases safely to the wall studs is critical for structural integrity and household safety, particularly in homes with children or pets. Use heavy-duty structural screws driven through interior framing members directly into the wall studs. If your bookcase sides do not align perfectly with existing studs, use toggle bolts or heavy-duty wall anchors in the drywall, though direct wood-to-stud connections remain the gold standard. Check your levels continuously during this phase; catching a slight tilt early prevents crooked shelves later.
Adding Custom Trim, Molding, and Paint
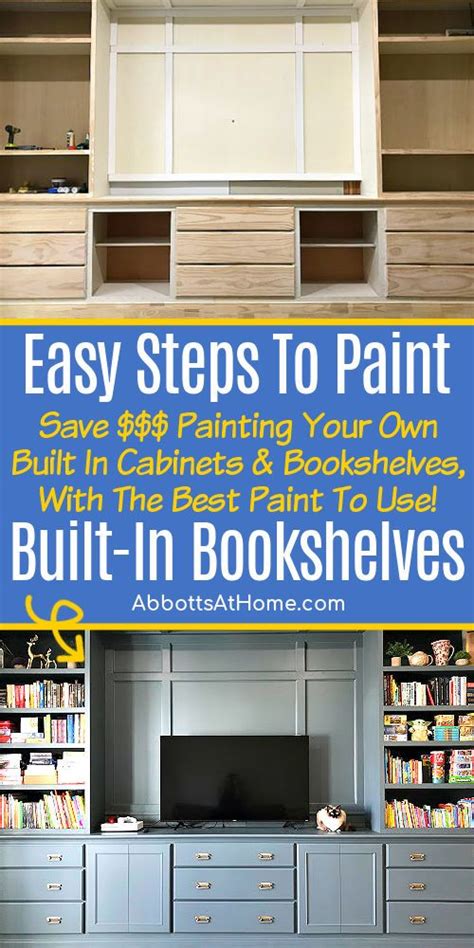
The secret that separates amateur freestanding bookshelves from professional custom built-ins lies in the trim work. Once your main structure is secured, fill any visible screw holes with wood filler, let them dry, and sand them flush. Apply generous amounts of paintable latex caulk along every seam where the bookshelf meets the wall, ceiling, and baseboards. This single step eliminates shadows and gaps, making the shelving look as though it sprouted organically from the architecture of the room.
Elevate the visual weight of the unit by installing crown molding at the top and matching baseboard trim along the bottom platform. Next, apply a coat of high-adhesion primer, followed by two coats of semi-gloss or satin enamel paint. Spraying the paint yields an ultra-smooth finish, though a high-density foam roller and a fine-bristle brush produce exceptional results when applied with patient, even strokes. Allow the paint to cure fully for several days before loading the shelves with heavy items to prevent sticking and scratching.
Styling and Accessorizing for Maximum Coziness
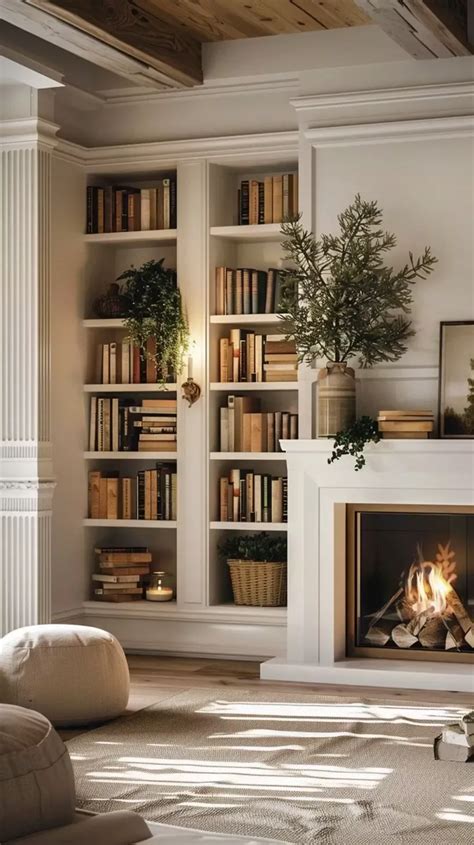
Once your paint has cured, the fun part begins: styling the shelves to create a warm, inviting atmosphere. Resist the urge to pack every linear inch with books standing in rigid, uniform rows. Instead, create visual breathing room by mixing vertical book stacks with horizontal piles that act as platforms for small decorative objects, framed photographs, or trailing house plants like pothos or ivy.
Incorporate a variety of textures and natural materials to enhance the cozy feel characteristic of well-loved American living spaces. Weave in elements like woven baskets for hidden clutter storage, ceramic vases, vintage brass accents, and rich fabric-bound volumes. Vary the rhythm of your displays across different shelves, alternating heavy groupings on the left with lighter, minimalist arrangements on the right, ensuring your custom built-ins feel curated, lived-in, and deeply personal.
Frequently Asked Questions
How do you make freestanding bookshelves look like custom built-ins?
The key to transforming standard bookcases into custom built-ins is eliminating all visible gaps between the unit and your walls, ceiling, and floors. By adding matching baseboards, crown molding, and sealing all joints with painter’s caulk before painting the entire assembly the same color as the wall or trim, the unit appears seamlessly integrated into the room’s architecture.
What tools and materials are needed for a DIY built-in bookshelf project?
Essential materials include cabinet-grade plywood or MDF, select hardwood for trim, wood glue, pocket-hole screws, caulk, and primer. Key power tools include a miter saw, circular saw or table saw, brad nailer, power drill, and an orbital sander. Always use a stud finder and proper wall anchors for safety.
How can renters achieve a built-in bookshelf look without permanent damage?
Renters can achieve a similar aesthetic by securing modular, heavy-duty bookcases to the wall using minimal anchor points required by safety codes, and framing them out with lightweight MDF or foam board trim attached with removable adhesive strips or minimal finishing nails that are easily patched upon moving out.
What are the best styling techniques to make bookshelves feel cozy and inviting?
To maximize coziness, avoid over-stuffing every shelf with books. Mix vertical book storage with horizontal stacks, incorporate natural textures like woven baskets and wooden bowls, add trailing houseplants, and balance heavy items with airy decorative accents like framed art and pottery.
How do you anchor built-in bookshelves safely for home safety?
Always anchor your built-in unit directly into wall studs using sturdy structural screws through the top or upper back framing members. If studs do not line up with your internal partitions, utilize rated toggle bolts in the drywall to prevent tipping hazards, ensuring the heavy structure remains stable under load.


