Finding storage that fits both your aesthetic vision and your household budget can often feel like an uphill battle. Mass-produced shelving units frequently miss the mark, either failing to match your exact room dimensions or coming with a hefty price tag that strains seasonal home improvement funds. Fortunately, turning simple wooden crates and sturdy boxes into custom wall storage offers an accessible, highly customizable alternative. By embracing box DIY shelves, homeowners and renters alike can introduce rustic charm, mid-century minimalism, or modern industrial flair into their living spaces without requiring an advanced workshop or specialized carpentry tools.
Beyond aesthetics, this approach solves a fundamental organizational challenge across typical American family homes: the need for adaptable storage that evolves alongside daily life. Whether you are aiming to corral a growing collection of children’s picture books in a shared bedroom, display treasured ceramics in the living room, or organize entryway accessories, modular box shelving provides an immediate solution. Because these systems are built from individual modular units, you can rearrange, expand, or re-paint them as your spatial needs change, making them one of the most versatile investments you can make in your home’s functionality.
Selecting the Right Materials for Your Box Shelves
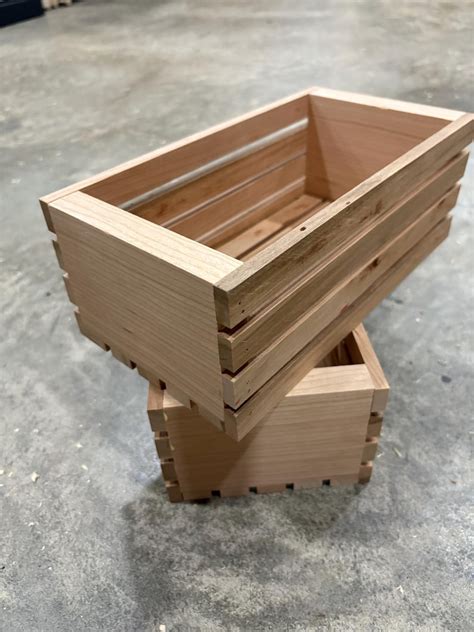
The foundation of any successful DIY shelving project lies in sourcing materials that balance durability, safety, and visual appeal. Solid pine wooden crates, frequently found at local craft stores, home improvement centers, or repurposed from shipping packaging, remain the gold standard for wall-mounted box shelves. When inspecting potential crates, look for uniform thickness and sturdy corner joints rather than purely decorative packaging boxes. Pine and cedar hold up exceptionally well to sanding, staining, and the weight of everyday household items, ensuring your finished product looks intentional rather than improvised.
For households with young children or pets, material safety deserves careful consideration. Many commercial shipping crates are treated with chemical preservatives or fumigants, so always verify that raw wooden boxes are safe for indoor residential use. If you are working on a strict budget, unfinished craft store crates provide a clean slate without chemical concerns. Alternatively, sturdy cardboard storage boxes reinforced with heavy-duty decoupage or contact paper can serve as ultra-lightweight, renter-friendly accent cubbies, provided they are restricted strictly to storing low-weight items like yarn, lightweight paper goods, or faux greenery.
Preparation, Sanding, and Finishing Techniques
Raw wooden crates often arrive with rough edges, splinters, and surface blemishes that can detract from a polished look. Before you apply any paint or wood stain, dedicate adequate time to thorough surface preparation. Start by using a medium-grit sandpaper (around 120-grit) to smooth down splintered slats, corners, and inner seams. Follow up with a finer 220-grit sandpaper to create a silky, tactile surface ready to absorb finishes evenly. Neglecting this crucial step is a common pitfall that often results in a sloppy finished appearance, especially once dark stains or glossy paints highlight every imperfection.
Once sanded, wiping away all sawdust with a tack cloth prepares the wood for transformation. If your design calls for a rustic, farmhouse aesthetic, a water-based wood stain paired with a clear matte polyurethane topcoat protects the wood while highlighting natural grain patterns. For a modern, cohesive look in a contemporary American living room, apply a low-VOC primer followed by two coats of satin or eggshell latex paint in a tone that complements your existing wall color. Always allow sufficient curing time between coats to prevent tackiness, and ensure any finish you choose is certified non-toxic and low-odor if the shelves will sit in a nursery or children’s playroom.
Creative Room-by-Room Configurations and Layouts
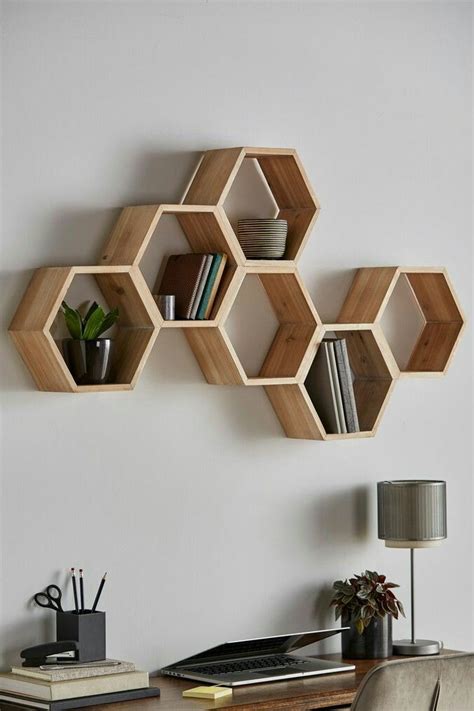
One of the greatest advantages of modular box shelving is the freedom to experiment with non-linear wall layouts. Instead of hanging uniform rows, consider arranging square wooden crates in an asymmetrical geometric pattern above a sofa or desk. By turning some boxes vertically and others horizontally, you create dynamic shadow lines and varied compartments that accommodate both tall books and small decorative objects. This approach breaks up the monotony of flat drywall and draws the eye upward, making standard-height ceilings feel taller and more expansive.
In kids’ bedrooms and playrooms, mounting box shelves at lower levels provides children with accessible spots to store and retrieve their own toys, fostering independence and easy cleanup habits. You can paint the interiors of the boxes in vibrant, contrasting colors to add a playful touch that delights younger family members. For home offices or kitchens, stacking smaller boxes vertically on a desktop or mounting them as a floating pantry spice rack maximizes vertical real estate, keeping essential daily tools within arm’s reach while maintaining an uncluttered, curated tabletop.
Safe Mounting and Wall Anchoring for Family Homes
Safety must always guide the installation process, particularly in busy family homes where wall-mounted objects experience daily vibrations and accidental bumps. Whenever possible, drive your mounting screws directly into wooden wall studs using a reliable electronic stud finder. When stud placement does not align with your preferred crate layout, invest in high-quality drywall toggles or heavy-duty anchors rated for the specific weight your shelves will bear. Always verify the maximum load capacity of your chosen hardware, distinguishing clearly between lightweight decorative display and heavy book storage.
To secure wooden crates to the wall, drill pilot holes through the interior back panel of the crate directly into your wall anchors or studs, using decorative washers to distribute pressure evenly and prevent the wood from splitting. If you decide to stack multiple crates on the floor rather than mounting them to the wall, anchor the upper tiers to the wall studs using furniture safety straps to prevent accidental tipping hazards. Taking these precautions ensures that your creative storage solution remains secure, stable, and completely safe for every member of your household for years to come.
Frequently Asked Questions
What kind of boxes work best for DIY wall shelves?
Solid pine wooden crates with reinforced corners work best for sturdy wall-mounted shelving. They offer a strong load-bearing capacity and can be easily sanded, stained, or painted to match your decor.
How do you safely mount box shelves to drywall?
Always anchor your shelves into wooden wall studs whenever possible. If studs are unavailable, use rated drywall toggles or heavy-duty anchors, and secure the back panel of the crate directly to the wall using appropriate screws and washers.
How can you style box shelves so they look high-end rather than cluttered?
Avoid overcrowding the shelves. Balance functional items with decorative objects like small plants, framed photos, and curated book stacks, leaving some negative space within each box.
What is the most cost-effective way to source materials for box shelves?
Unfinished wooden craft crates purchased in multipacks from big-box hobby stores or local home improvement centers provide an affordable, uniform, and safe option for indoor shelving projects.


