A well-crafted built-in shelving unit transforms an ordinary room into a custom-designed space with architectural presence. Unlike freestanding furniture, built-ins anchor to the wall, utilizing every vertical inch while creating a seamless connection with the surrounding architecture. Whether you want to frame a fireplace, turn a blank hallway into a library, or maximize a tricky bedroom nook, building custom shelves gives you total control over dimensions, materials, and finish styles.
Approaching this type of project requires careful preparation, realistic expectations regarding woodworking skills, and an understanding of structural limitations. While the process demands patience and precision, breaking the installation down into manageable phases makes it achievable for dedicated DIYers. Homeowners can secure units directly into wall studs for permanent stability, while renters can adapt similar frameworks using tension systems or minimal-impact mounting brackets to achieve the built-in aesthetic without violating lease agreements.
Phase 1: Planning, Measuring, and Designing Your Layout
Successful built-ins begin with meticulous measuring. Walls and floors in most homes are rarely perfectly plumb, level, or square. Take measurements at multiple points—top, middle, and bottom of your intended space—and always use the smallest dimension to ensure your outer frame fits without requiring aggressive modification during installation. Sketching your vision on graph paper helps test different vertical spacings, keeping proportions balanced and functional for books, baskets, or decorative objects.
Consider your weight requirements when determining shelf spans. Hardwoods like oak and maple can span greater distances without sagging, whereas standard MDF or whitewood boards require shorter spans or intermediate vertical supports to stay rigid under heavy loads. If you are designing for a rental, plan a modular framework that rests securely against the wall with minimal anchoring points, making removal and patching straightforward when moving day arrives.
Phase 2: Gathering Materials, Hardware, and Tools
Selecting the right materials dictates both the durability and the aesthetic outcome of your shelving unit. Medium-density fiberboard (MDF) provides an exceptionally smooth, paint-grade surface that resists warping, making it ideal for clean, modern painted built-ins. Plywood works wonderfully for structural carcasses and stain-grade applications, provided you apply edge banding to cover exposed raw plies. Solid wood trim pieces add crisp definition and help disguise minor gaps where the shelving meets the wall.
Essential tools for this project include a circular saw or table saw, a miter saw for precision trim cuts, a reliable power drill, a stud finder, a level, and a pneumatic brad nailer if available. Safety gear such as dust masks and safety glasses are non-negotiable when cutting manufactured wood products or working overhead. Having wood glue, painter’s tape, a caulk gun, and wood filler on hand prepares you for the finer assembly and finishing stages.
Phase 3: Constructing the Outer Frame and Wall Cleats
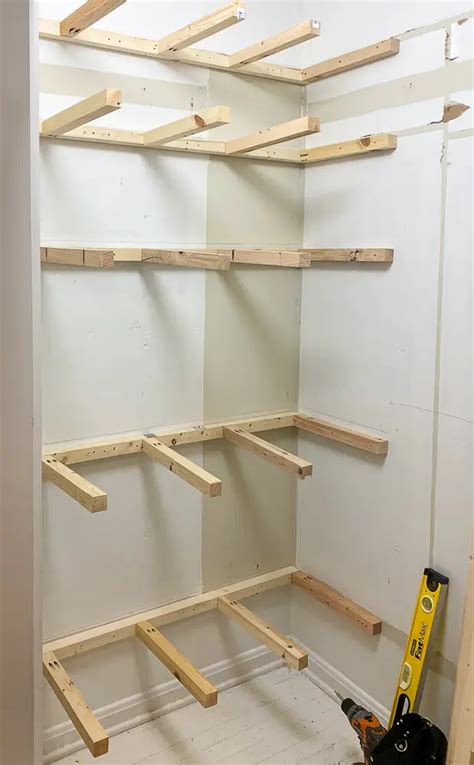
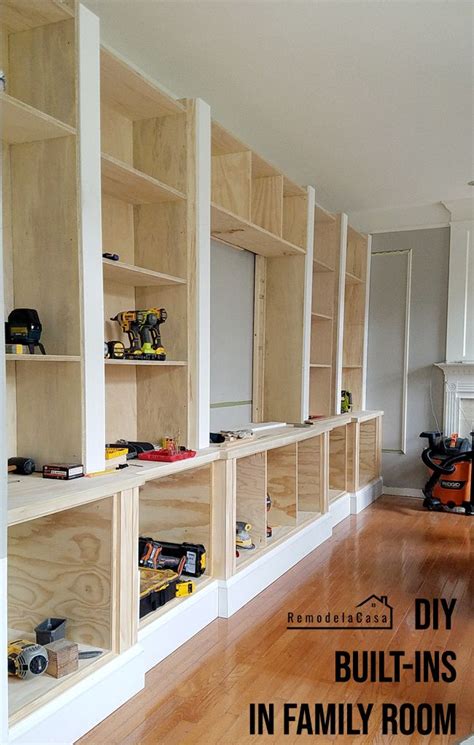
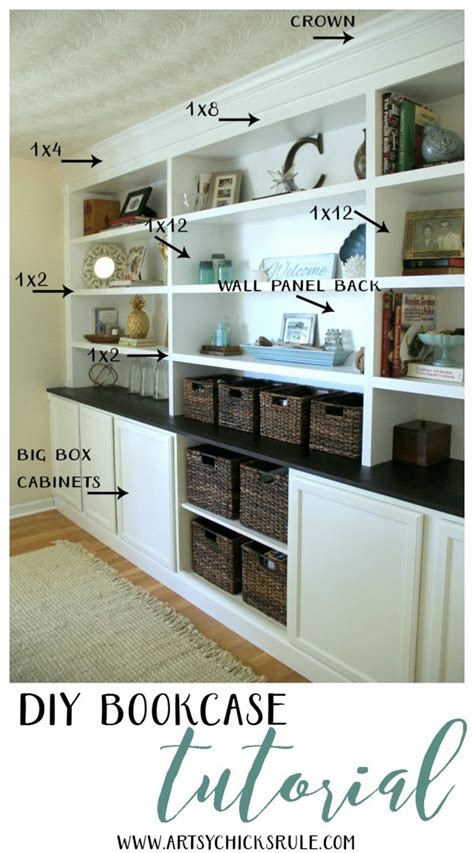
The structural backbone of any successful built-in is its outer frame and interior wall cleats. Secure 1×2 or 2×2 wood cleats directly into the wall studs using heavy-duty structural screws, ensuring they are perfectly level across the entire span. These cleats will support the weight of your side panels and individual shelves, so taking time with your stud finder and level pays dividends in structural safety.
Once the wall cleats are firmly anchored, assemble the outer vertical uprights and header boards to form your main carcass. Slide this assembly into place against the wall cleats and fasten the frame securely. If your floor slopes slightly—a common feature in older homes—use wood shims beneath the bottom base plate to level the entire unit before final anchoring. Conceal any gaps between the shims and the floor with baseboard trim later.
Phase 4: Installing Shelves and Custom Trim Work
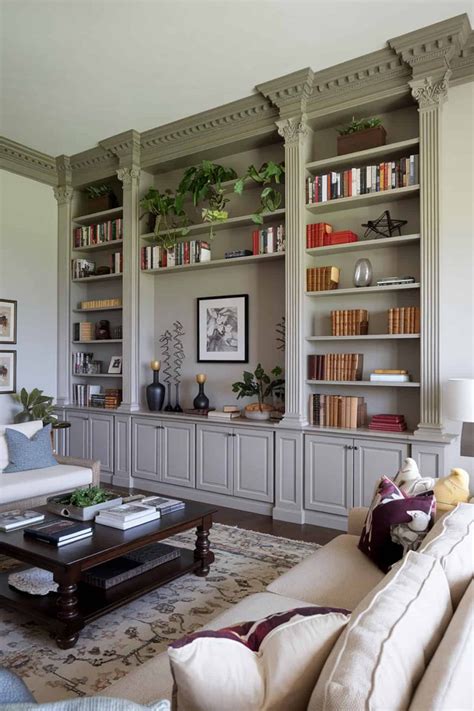
With the outer frame rigid and secure, you can install the individual shelf boards. If you prefer adjustable shelving, install metal shelf standards inside the uprights before mounting the frame. For fixed shelving, screw or nail the shelves directly into the horizontal interior cleats. Use a level on every single shelf as you go to prevent rolling items or uneven visual lines.
The transformation from basic lumber to custom millwork happens during the trim phase. Cover all exposed plywood edges with iron-on edge banding. Apply face-frame molding, crown molding at the top, and baseboard trim at the bottom to bridge any gaps between your unit and the surrounding drywall. A generous application of paintable caulk along all wall and joint seams creates that coveted, high-end built-in look where the furniture appears to grow right out of the wall.
Phase 5: Finishing, Painting, or Staining
The final phase seals your woodwork and brings your design vision to life. Fill all nail holes, screw heads, and minor imperfections with lightweight wood filler, allowing it to dry completely before sanding smooth with fine-grit sandpaper. Vacuum away all dust and wipe down the entire unit with a tack cloth to ensure a pristine surface for your finish coat.
If you are painting your built-ins, apply a quality shelloc- or oil-based primer first to block wood tannins and provide a strong bond for your topcoats. Use a fine-nap foam roller and a high-quality angled brush to achieve a smooth, brush-stroke-free finish across flat surfaces and detailed trim. For stained units, apply a pre-stain wood conditioner to ensure even color absorption before layering your preferred wood stain and protective polyurethane topcoat.
Frequently Asked Questions
How do I plan a built-in shelving unit for my wall dimensions?
Begin by taking precise measurements at multiple heights and widths along the wall, noting any irregularities in plumb or level. Design your vertical column spacing based on what you plan to store, ensuring heavier items sit on lower shelves supported by sturdy cleats anchored directly into wall studs.
What tools and materials are essential for building custom shelves?
Key materials include paint-grade MDF or cabinet-grade plywood, solid wood trim, and wall cleats. Essential tools consist of a power drill, a miter saw, a stud finder, a spirit level, a brad nailer, wood glue, and safety equipment like dust masks.
How can renters create a temporary built-in look?
Renters can build modular, freestanding bookcase towers that anchor lightly to the wall using minimal-impact toggle bolts or heavy-duty furniture straps. Framing the perimeter with removable trim attached with small adhesive strips or finishing nails can also mimic a custom built-in appearance without permanent structural alteration.
How do I anchor shelving safely to drywall and studs?
Always locate and screw structural framing members, such as wall cleats, directly into wooden wall studs using appropriate length screws. Where studs do not align with your design, use heavy-duty drywall anchors rated for the expected weight capacity of your loaded shelves.